How an Instant-Lock Sleeve Works: Expand, Lock and Seal
See how the steel sleeve, rubber jacket and mechanical lock work together, what the installation packer does, and what remains inside the pipe.
By Reliance Trenchless Technology5 min read
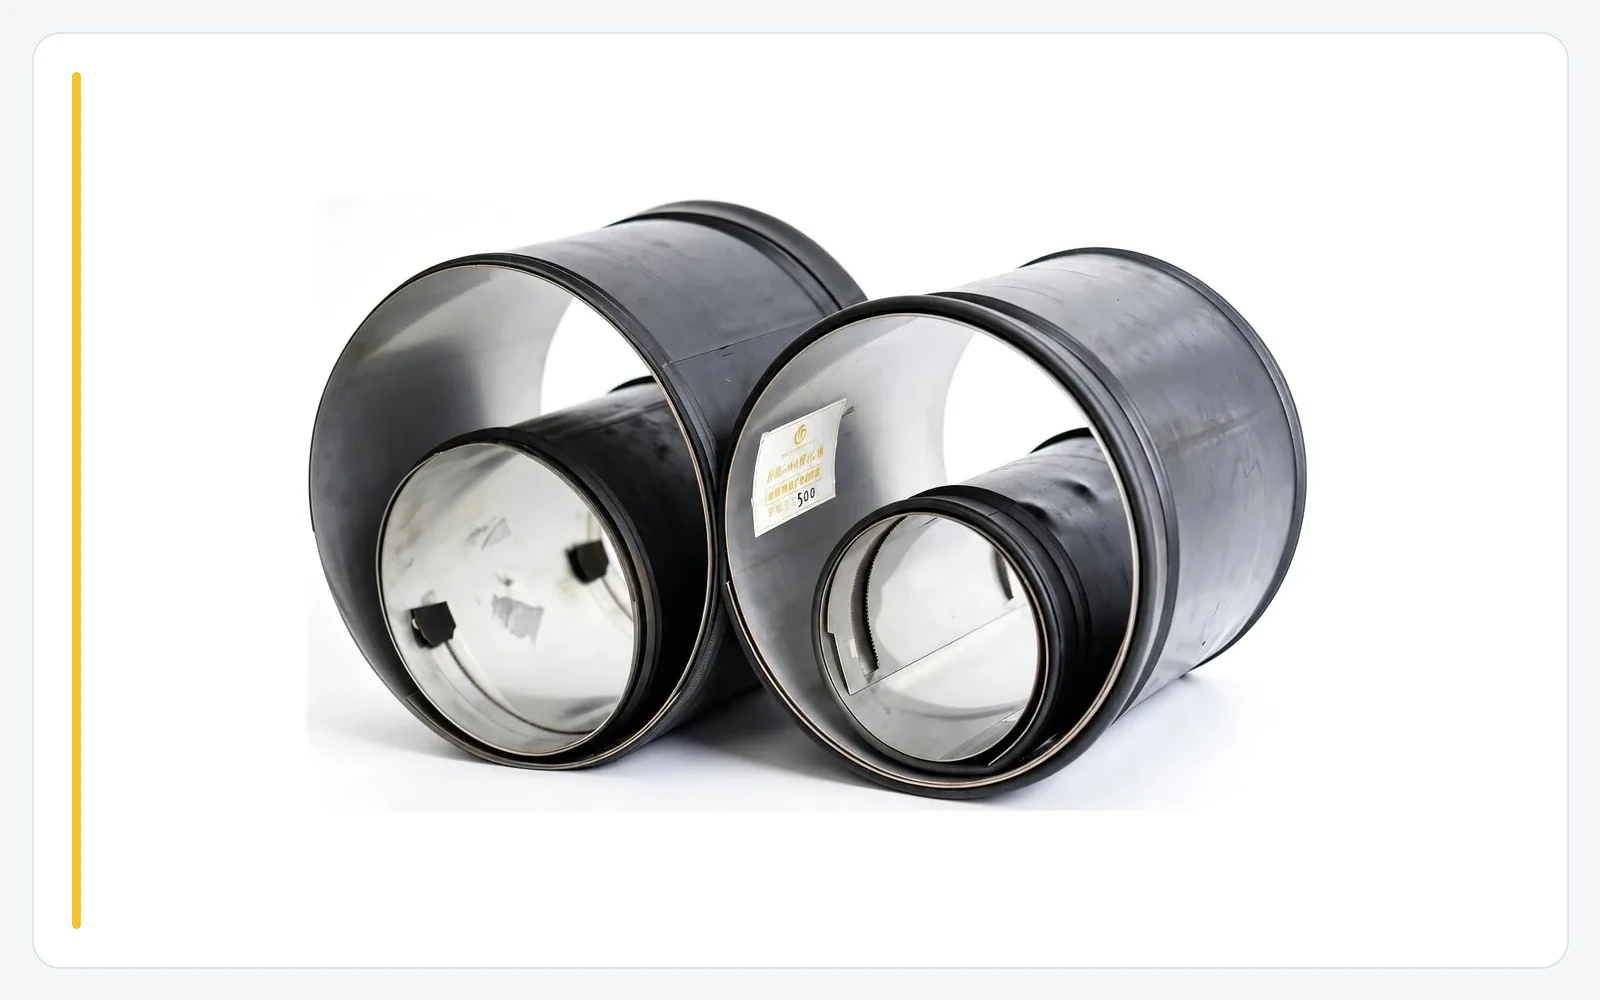
An Instant-Lock sleeve stays expanded because its mechanical lock secures the opened steel sleeve; the installation packer supplies the expansion force, and the outer rubber jacket forms the sealing interface with the pipe. These are three different jobs. Reliance's Instant-Lock Small sleeves combine a stainless steel sleeve and an EPDM rubber jacket, with a toothed strip and locking gear described in the product brochure, pages 1–2.
The useful question is what remains after the installation tool is removed. The sleeve and jacket remain at the repair location; the packer is installation equipment. This article explains that arrangement for the small-sleeve system, from its layers to its expanded state.
Three layers, three different roles
Picture a cross-section through the repaired location. From outside to inside, you encounter the existing pipe, the rubber jacket and the steel sleeve. The jacket sits between the metal and the host pipe rather than inside the open flow passage.
NASSCO's description of mechanical seals, under “Mechanical Seals (Internal Stainless-Steel Sleeves),” explains the general principle: an internal steel sleeve expands to compress a rubber gasket against the host pipe. Reliance's brochure identifies EPDM as the jacket material for its Instant-Lock system.

The steel sleeve expands under the packer's force, and the mechanical lock retains its expanded configuration. The rubber jacket supplies the compressible contact layer. The existing pipe provides the surface against which the jacket is pressed. Understanding those roles explains why the pipe's actual condition and shape matter as much as the product name.
What changes as the sleeve expands?
For Instant-Lock Small, the brochure's second page describes positioning the sleeve on an installation packer, expanding it against the pipe wall and checking that the locking gear is fastened. The diagram below separates the three states so the mechanism is easier to follow.
Positioned: the sleeve-and-jacket assembly is carried at the repair location on the installation packer.
Expanded: the packer pushes the sleeve outward, bringing the jacket against the host pipe; the locking mechanism secures the expanded configuration.
Tool removed: the sleeve and jacket remain, while the installation packer is withdrawn.
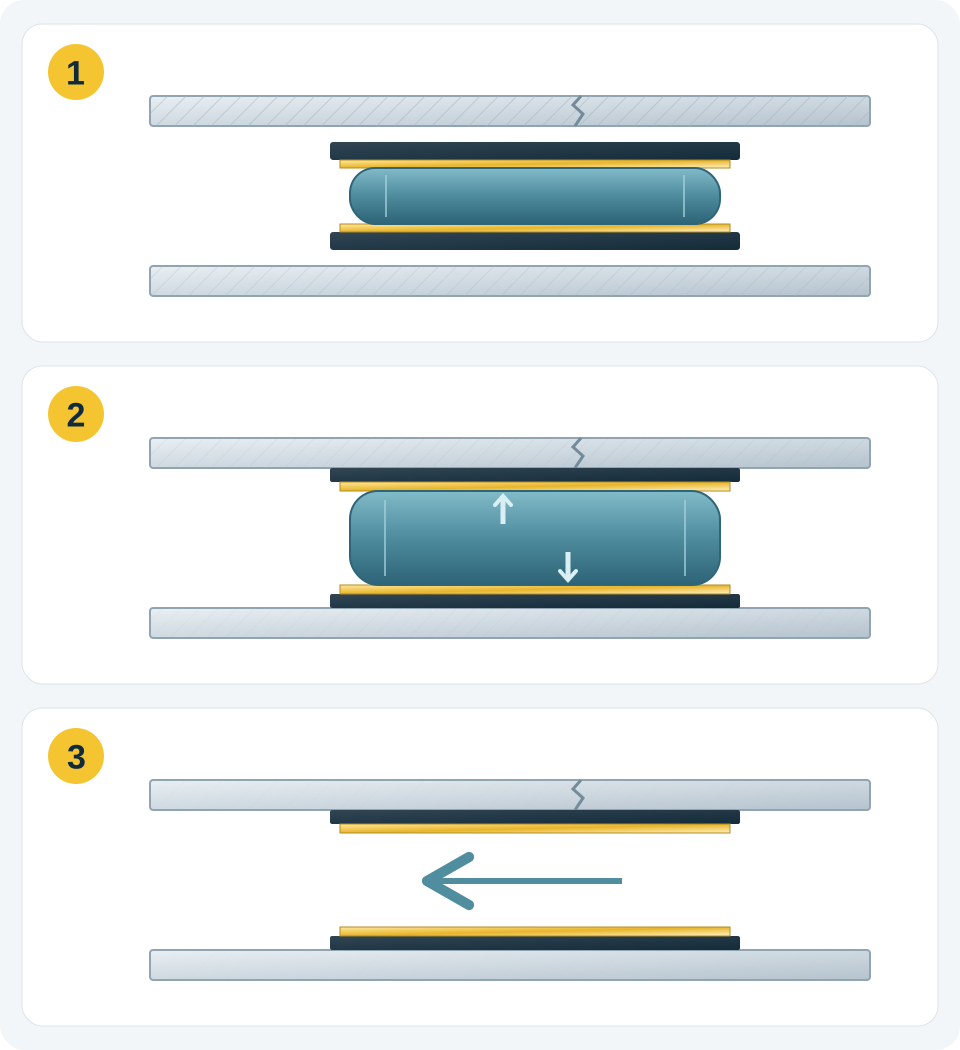
The diagram explains the arrangement, not a complete installation procedure. Pressure settings, preparation, lock checks and acceptance requirements belong to the instructions for the selected sleeve and installation tool.
The toothed strip is the detail to look for
A smooth cylinder alone does not explain how the expanded configuration is retained. Look inside the photographed sample: the toothed strip and locking assembly are visible along the overlapping steel. The small-sleeve brochure describes toothed strips and a locking gear.
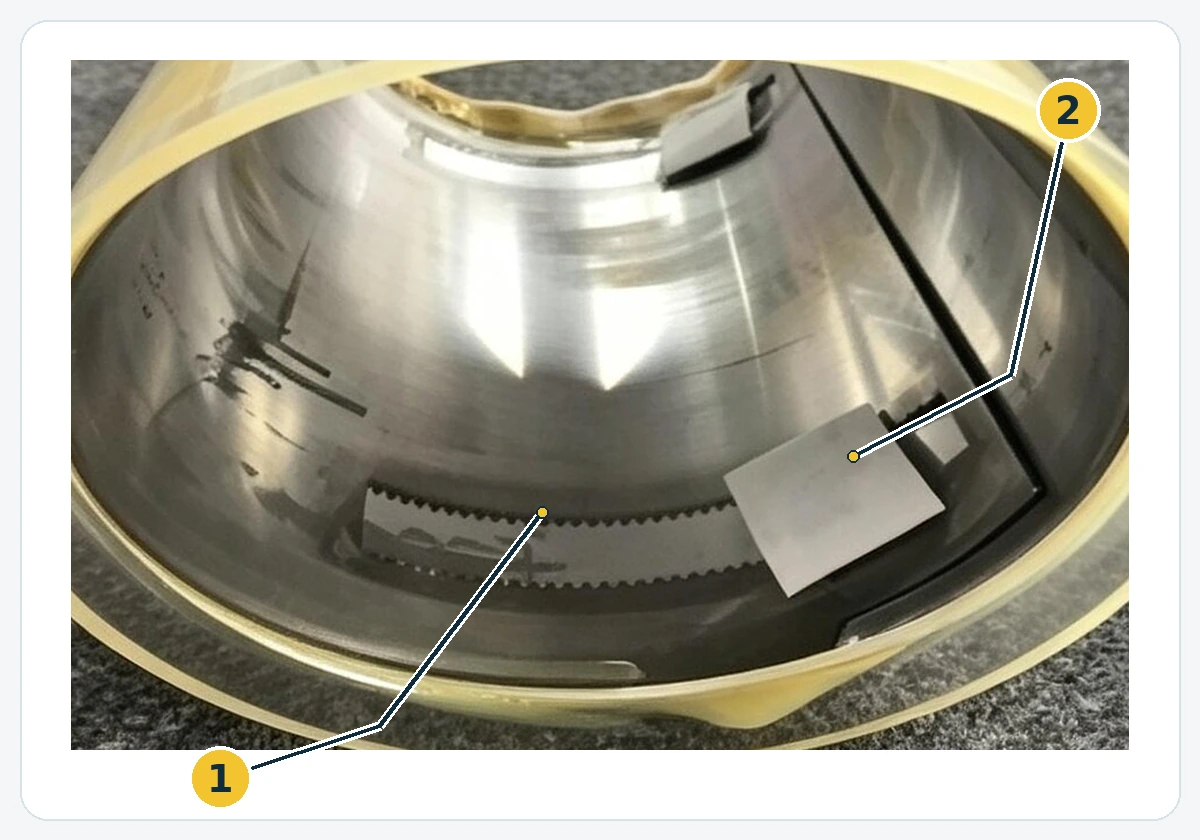
Expansion and locking are related, but they are not the same check. For Instant-Lock Small, the brochure describes a second inflation to ensure that the locking gear is fastened. A photograph showing a wide-open sleeve cannot establish that a particular installation has passed that check. Nor does the photograph measure the lock's holding strength.
How is this different from a resin patch?
Both approaches can place a local repair inside an existing pipe, but what forms the repair is different. NASSCO's CIPP joint/spot-repair description describes resin-impregnated material wrapped around an inflatable packer, positioned at the defect and cured using the method appropriate to the resin.
| Question | Mechanical sleeve | Resin-and-fiberglass patch |
|---|---|---|
| What forms the repair? | A steel sleeve with an outer rubber jacket | Resin-impregnated reinforcement that cures in place |
| What creates the final state? | Mechanical expansion and locking | Curing of the selected resin system |
| What remains in the pipe? | The sleeve and jacket | The cured repair material |
The mechanical sealing principle does not rely on curing a resin. That does not make every sleeve suitable for every defect, or establish that a project can proceed without flow management. For a fuller comparison, see repair sleeves versus resin-and-fiberglass patches.
What to check before choosing a sleeve
A working lock is only one part of a suitable repair. NASSCO's assessment guidance identifies pipe condition and physical dimensions as key inputs to rehabilitation. CCTV identifies defects and obstructions; laser or sonar inspection can quantify diameter, ovality and offsets.
For a configuration review, gather the measured internal diameter, defect location and extent, inspection images, pipe material, access route and service conditions. Identify the installation equipment you already have. Reliance's small-sleeve spreadsheet lists installation packers alongside the sleeve sizes; an arbitrary inflatable tool is not a documented match. Some fit ranges differ between the brochure and spreadsheet, so request confirmed dimensions for the quoted configuration.
Send these records with a small-sleeve technical enquiry. If the proposal concerns the large-sleeve family, request its own equipment and installation documents. The small-system explanation above does not establish the large system's procedure.
References and source documents
Further reading
Article
Folded Size vs Sealing Diameter: Can a Plug Fit the Opening?
Article
Single-Size vs Multi-Size Pipe Plugs: Comparing Fit Ranges
Article
Pipe Plug vs Repair Packer: What Is the Difference?
Buyer guide
Stainless Steel Pipe Repair Sleeves vs Resin-and-Fiberglass Patches